A practical podcast setup for Hindi-speaking creators in India starts with a microphone, wired headphones, a recording device, and a quiet place to speak. This guide separates beginner, budget, and pro options, explains where an audio interface fits, and shows how to record remote guests with Zencastr. Start with the setup you can operate confidently, then upgrade around a specific recording problem.
What Equipment Do I Need to Start a Podcast?
You need a way to capture your voice, listen to the recording, and save it reliably. For a first practice episode, use a phone or computer you already own with compatible wired earphones. For a dedicated setup, consider a USB microphone and headphones. Zencastr recommends an external microphone and headphones for remote recording.
Build your initial podcast equipment kit around these essentials:
- Microphone: Begin with an existing compatible headset or choose a dedicated USB microphone for a computer-based workflow.
- Wired headphones: Use them throughout interviews to help prevent the guest’s voice from feeding back into your microphone.
- Recording device: Test your phone or laptop with your chosen recording tools before scheduling an episode.
- Stable support: Put a dedicated microphone on a suitable stand rather than holding it throughout a conversation.
- Recording software: Choose a workflow that lets you capture, review, and retrieve your files. Zencastr supports separate participant recordings for remote interviews.
Before shopping, decide whether your show will feature solo Hindi commentary, remote interviews, or two people sitting together. Make that decision first so your shopping list serves the format, not an imagined studio.
Beginner, Budget, and Pro Gear Levels
Treat these categories as workflow choices, not promises about how professional your show will sound. Choose the smallest arrangement that handles your planned episodes, then test it in your actual recording room. A microphone cannot repair the acoustics of the space around it.
Beginner: Validate the Show With Existing Equipment
The beginner level is for practising delivery and completing a pilot before buying dedicated audio equipment. Try a smartphone with its recording app, or an existing laptop and compatible wired headset. Test the complete combination rather than assuming every connector or adapter will work.
Record a short Hindi introduction, a conversational passage, and a deliberately louder sentence. Listen back before committing to a full episode. Use this pilot to decide whether your immediate problem is distracting background sound, inconsistent delivery, or simply an awkward recording routine.
For remote practice, Zencastr supports Chrome, Edge, and Brave on desktop, alongside supported mobile options. Check its current device requirements before inviting a guest.
Budget: Build a Dedicated Solo Recording Setup
The budget level is for creators ready to use a dedicated microphone without building a multi-input studio. One example is the Audio-Technica ATR2100x-USB, listed through Audio-Technica’s Indian catalogue. It offers USB and XLR connections, a headphone socket for direct monitoring, and a supplied desktop stand. Confirm local stock before ordering.
Use its USB connection for a straightforward computer-based podcast mic setup. Keep your existing wired headphones if they work properly, and assess the supplied stand before buying an arm. Its XLR output also leaves room for a later interface-based workflow without immediately replacing the microphone.
For a solo Hindi explainer or a host interviewing guests online, start by testing this simpler arrangement. Add accessories only when you can explain what they will solve.
Pro: Build Around Regular Production and In-Person Guests
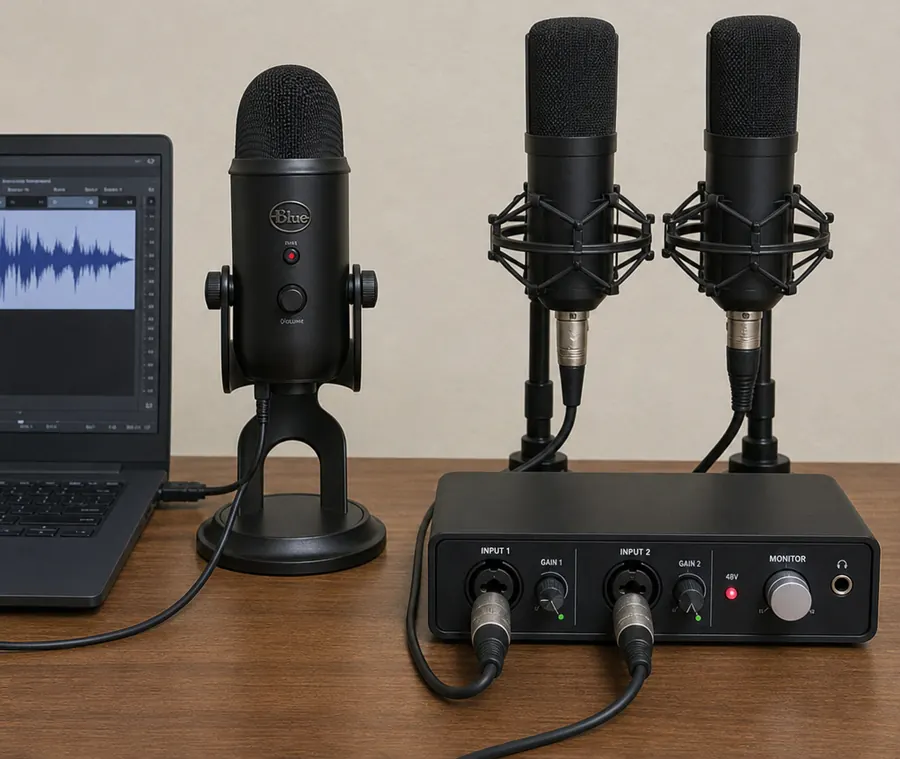
The pro level is for a repeatable workflow with more physical inputs, dependable mounting, and deliberate monitoring. A relevant example is a Shure MV7X XLR microphone paired with a Focusrite Scarlett 2i2 interface. The MV7X appears in Indian distributor Sun Infonet’s catalogue, while Focusrite interfaces are sold through Indian authorised dealers.
The Scarlett 2i2 has two microphone preamps, making it an option for a two-person recording arrangement. Add a microphone and suitable cable for each speaker, plus a monitoring solution for everyone. Note that the interface has one headphone output, so two listeners require additional planning.
Do not buy this level merely for appearance. Reserve it for a format that genuinely needs the extra connections and setup work.
Do You Need an Audio Interface for Your Podcast?
You need an audio interface when using an XLR microphone with a computer-based recording workflow. A USB microphone connects directly without a separate interface. For example, the ATR2100x-USB supports both routes, while the Shure MV7X uses XLR. Choose according to your connections and recording format. More boxes do not automatically mean better sound.
For a solo host, start with USB if simplicity is the priority. For two in-person speakers, consider an interface with two microphone inputs, such as the Scarlett 2i2. Check the number of microphone inputs, not just the total input count.
Also test how your recording application receives those inputs. Do not assume that two microphones connected to one computer will automatically become two separate participant tracks in a browser session. Verify your intended routing in a rehearsal before recording an interview you cannot easily repeat.
Make an Indian Home Work as a Podcast Studio
Before buying more podcast equipment, test different rooms and recording times. If your home has tiled floors, bare walls, or large windows, try a furnished bedroom instead of an empty hall. Soft furnishings and reduced reflections can help create a more suitable voice-recording environment.
Adapt your sound recording routine to the interruptions you actually encounter:
- Traffic and construction: Try an interior room and compare morning, afternoon, and evening test recordings. Choose the quietest workable slot.
- Ceiling fans and coolers: Listen for steady noise before recording. If safe and comfortable, cool the room beforehand or pause noisy appliances for short takes.
- Shared family spaces: Agree on a recording window and put a visible note on the door. Ask for a brief pause before restarting an interrupted sentence.
- Street-facing windows: Compare microphone positions farther inside the room. Record samples with the microphone facing different directions.
- Power interruptions: Charge your recording device beforehand and plan what you will do if the internet or power drops.
These are practical experiments, not soundproofing measures. Shure recommends keeping microphones away from unwanted noise and reflective surfaces, then making sample recordings to identify better placement.
For Hindi narration, include your normal speaking style in every room test. If you switch between Hindi and English, rehearse both. Do not judge the setup from a single softly spoken line. Use the same opening passage when comparing positions so the decision is easier to make.
Set Up the Microphone for Clear Hindi Speech
Start with the microphone near your mouth and maintain a consistent distance. For a dynamic microphone, Shure suggests close technique in a quiet, soft-furnished space. Experiment within the microphone’s guidance. Moving too close can make a directional microphone sound excessively bass-heavy, while moving away lets more of the room into the recording.
Use this short setup routine before each session:
- Read naturally. Include Hindi words containing strong “p” and “b” sounds, then listen for distracting air bursts.
- Adjust placement. Try a slightly different angle or a suitable pop filter, and compare the result.
- Test your loudest delivery. Include laughter or an energetic introduction, then reduce input gain if the recording distorts.
- Keep the position repeatable. Adjust the stand so you can speak comfortably without leaning forward or drifting away.
Do not finish this check by looking at meters alone. Listen to the recorded sample through your headphones and confirm that the intended microphone, not the laptop’s built-in microphone, is selected.
How Do You Record Remote Interviews With Zencastr?
Use Zencastr to create a recording room, invite your guest, select each person’s microphone and headphones, and capture the interview. Zencastr records participants locally on their devices and uploads recordings to the cloud, with a separate track for each participant.
For a Hindi-speaking host in Lucknow interviewing a guest in Pune, plan a short technical rehearsal before the actual conversation. Send instructions in whichever language makes the guest most comfortable. Keep the equipment request simple: a supported device, compatible headphones, and the quietest available room.
Prepare the Room and Invite Your Guest
- Create the recording session. Name it clearly so you can identify the episode later.
- Choose the recording mode. Select audio only for an audio podcast, audio with visible video for visual conversation cues, or audio and video when you need recorded footage.
- Send the invitation. Use the Invite button to email your guest or copy the room link into your message. Guests do not need their own Zencastr account to join.
- Check devices together. Allow browser permissions, select the intended microphone and headphone output, and ask the guest to speak before recording.
Share the link privately, not publicly. Zencastr treats it as access to the recording room, and guests enter through a green room to configure their devices. Send it early enough for a rehearsal, especially when your guest has never recorded a podcast.
Record, Check Uploads, and Save the Files
Ask everyone to wear headphones to help prevent echo. Make a brief test, listen for distortion or background noise, and correct device selection or gain before continuing. If someone must use speakers, Zencastr recommends enabling echo cancellation.
After the interview, keep the recording tab open until uploads finish. A slower connection may need more time, and closing the tab too early can interrupt the upload. If the connection causes trouble, check pending uploads before assuming every file is complete.
Download the participant files and keep an untouched backup before editing. Separate tracks give you more control over each speaker’s recording, but local recording is not a substitute for checking that the session and uploads completed successfully.
Buy for Your Next Recording, Not an Imaginary Studio
When comparing podcast equipment in India, make a complete shopping list before checking out. Include cables, stands, adapters, and any extra headphone connections your format needs. Ask the seller to confirm the exact model, package contents, local warranty terms, and current availability. Do not rely on a photograph of a bundle.
Prioritise a purchase that fixes a problem you heard in your test recording. If your voice level changes because you keep moving, practise positioning first. If the room dominates the recording, revisit placement and furnishings. More expensive gear will not solve those issues on its own.
Start with a manageable setup, record a Hindi pilot, and build from what you learn. For your first remote conversation, try Zencastr and run a short rehearsal before inviting your audience to listen.